Blog
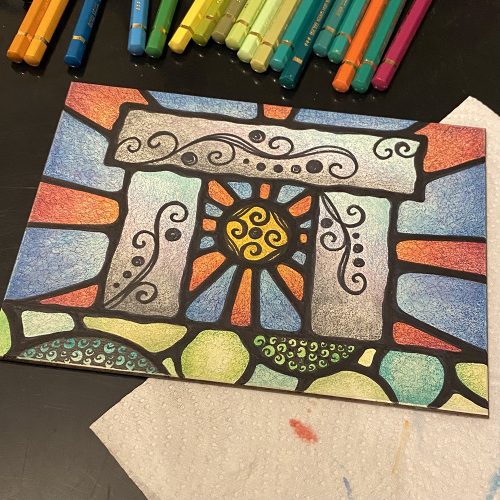
Winter Solstice Sun on Ampersand Aquabord
Views: 3
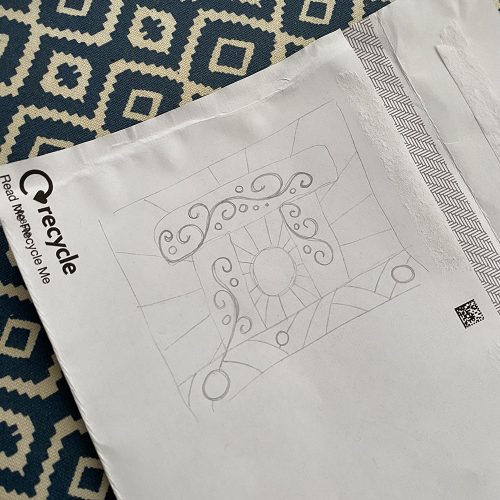
Step 1:
The initial idea doodle! These ideas race towards me at such a speed that I have to grab whatever bit of paper comes to hand first – this time an empty envelope. I draw in a frenzy. This is not usually exactly what the final piece becomes, but it’s the idea seed and the beginnings of the figuring out.
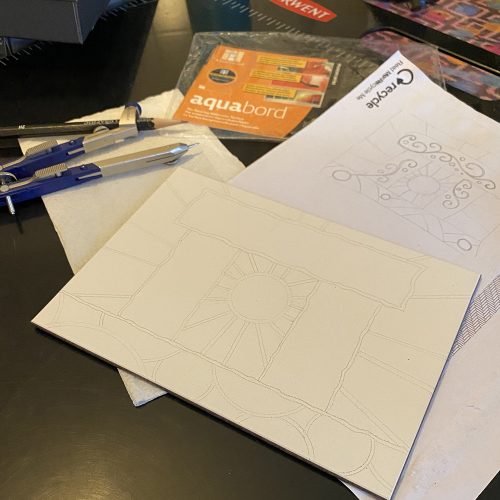
Step 2:
Re-draw the design onto the Aquabord. The compass is out to get a circular sun and semi-circles in the land, the ruler is out for those sun rays, and the Stongehenge inspired standing stones are drawn freehand. I just give myself the very basics of the design at this stage. All is drawn with a H or 2H graphite pencil, so that the lines are light.
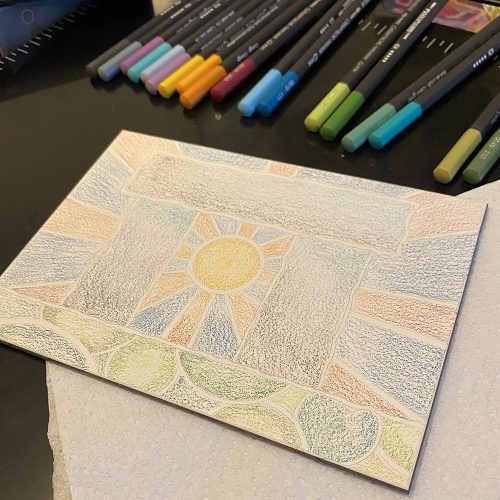
Step 3:
Colour is added using dry Caran d’Ache Museum Aquarelle Watercolour Pencils. At the moment, I’ve just added colour to the ‘glass’ sections and not to the ‘leading’ to try and keep the colours clean.
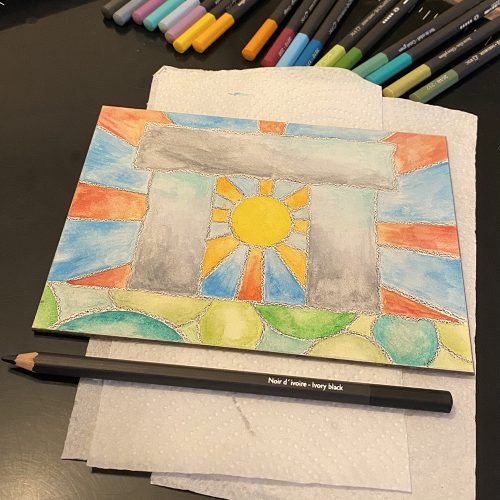
Step 4:
The adding of the water. This is my favourite part. This is magic in action, when the pigment bursts into vibrant colour. So much joy! The pigment dissolves beautifully on these boards, giving clean, smooth colour.
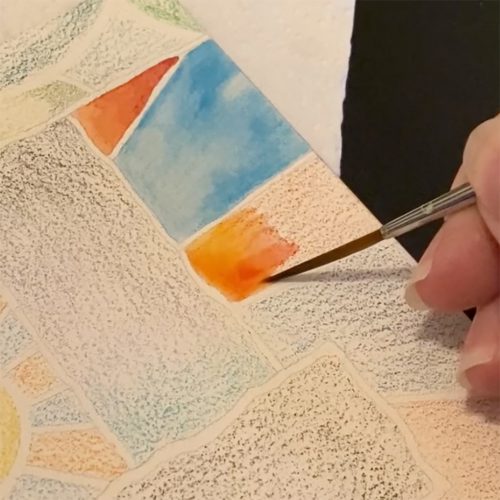
All of the pigment that I laid down initially has been magically transformed into a painterly effect, by the addition of water.
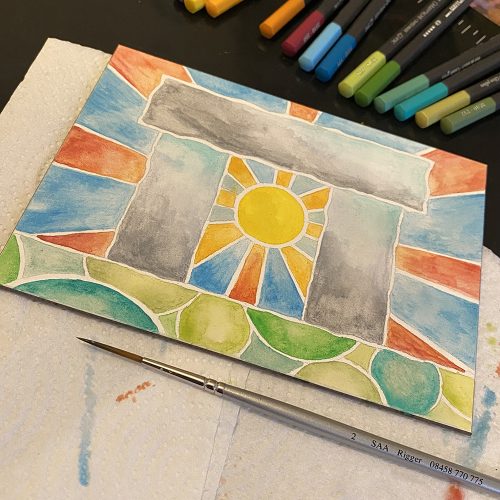
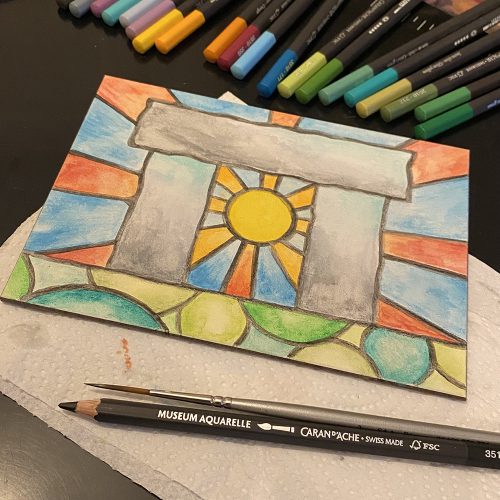
Step 5:
I have now drawn in the ‘leading’ with an Ivory Black Caran d’Ache Museum Aquarelle (used dry).
Step 6:
Adding water to the ‘leading’.
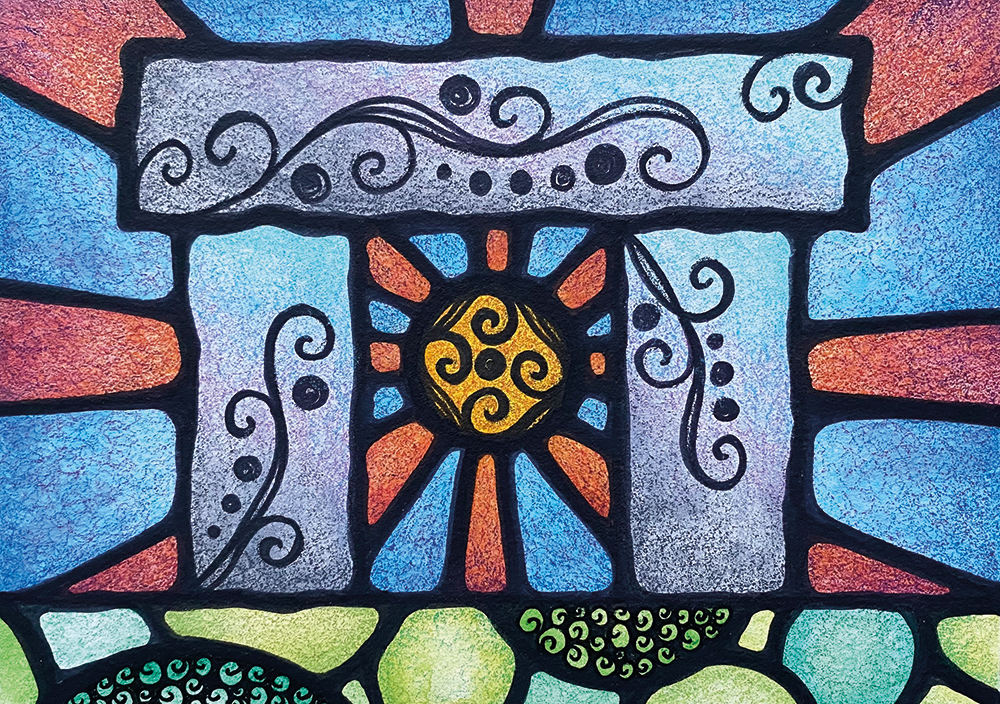
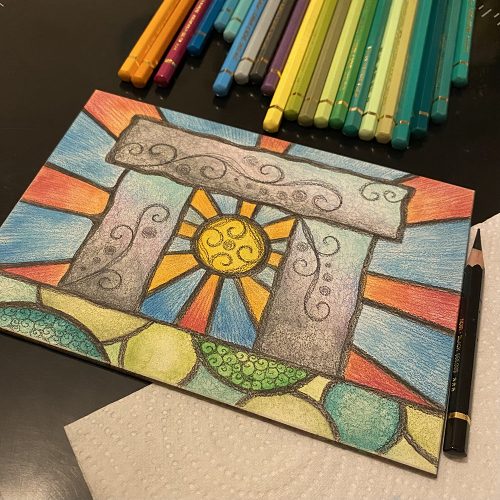
Step 7:
I used Caran d’Ache Pablo Pencils to add detail to all sections. Spiral patterning to the standing stones and squiggle wiggles to all the other sections.
Step 8:
Mistakes were made! I added in those lines in pencil to some of the ray panes as I thought they were too plain somehow but I really disliked it. The piece was put in the naughty corner whilst I scowled at it for a few days. Sit tight though, I wasn’t defeated.
Step 9:
I took out my eraser and really put this board to the test. I managed to erase all of the bits I didn’t especially like. There are not many surfaces that will allow you to do that! And although it wasn’t completely back to white, it was enough that I could then rework those areas. This picture is part way through the erasing as I realised I didn’t take a photo of all the erasing I did. I think I might have gone at it in a frenzy of needing to fix what I didn’t like!
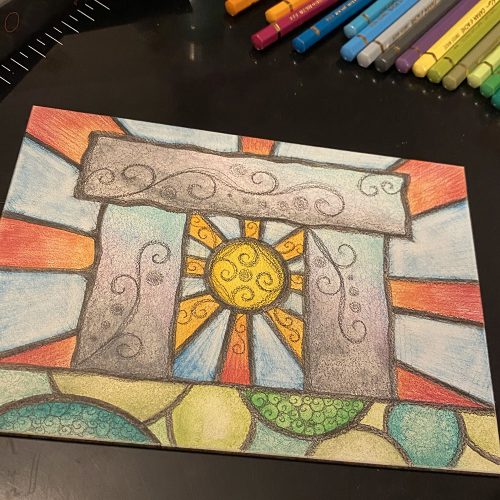
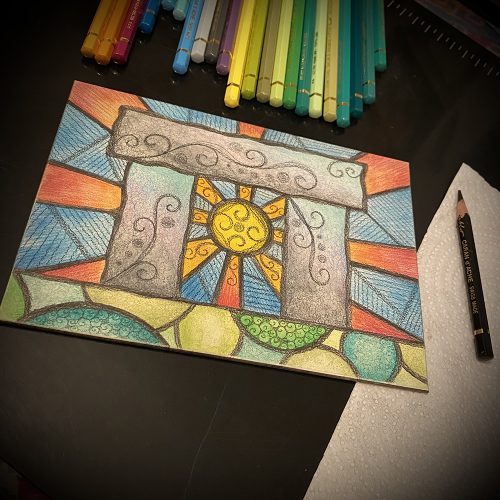
Step 10:
After all the erasing, I went back in with my pencils and squiggle wiggled to my heart’s content. I wanted a sort of frosted glass effect. I then used a black pen to really bring the ‘leading’ and patterning out. This piece is now complete. If I did this piece again, I think I’d make the colours more wintery, but I’m prone to going bright and this turned out to be no exception. So this Winter Solstice Sun at Stonehenge is really packing a punch!